The Baby Steps That Led to My Dream Bedroom and Bathroom
Heyyyy, it’s me, Remi!
Does your bedroom feel the way you always dreamed it would? Clean, comfy, and cheerful? If not, don’t worry! My bedroom went through a loooooot of iterations to get where it is today. There were even a few pauses along the way because I wanted to save money to do it just right! But taking all the baby steps to finally design have my dream room — was so freaking worth it!
I love spending time in my room now. I can find what I want to wear without it looking like a tornado afterward and take photos without having to move piles of stuff from one side of my room to the other. It’s the best! It also feels so calming and I love winding down here at the end of the day. Honestly, this journey has taken two years, and I’m so lucky to have had Dany from Spatial Soulutions helping me along the way.
Dany has helped me ask questions like, “What do I want this room to feel like?” And then turn my answer into real-life spaces. Our journey has included creating a beautiful living space for Monkey, my pet buns, discovering that spending money on lamps and matching pillows is WORTH it, and that a custom builder can transform your space without disrupting its integrity.
In this post, I’m going to walk you through the baby-steps we made to transform my wreck of a room into my dream room. (You can catch a sneak peek of the before and afters in this vlog!) So if you’ve been thinking about redoing your bedroom, are wondering what finishing touches to add for a polished look, or need some strategies to make your bathroom more functional, keep reading!
Baby Step #1: Get A Vision For Your Space
When I first moved in, I knew two things: 1) I didn’t have a lot of free money because I’d just spent it all on the house, and 2), I didn’t know what I quite wanted yet but I knew I DIDN'T want the decor to look bohemian. After I had saved up some money to start making the aesthetic changes I wanted, I hired Dany. When we walked into my bedroom, it was an absolute mess. I didn't know how to get rid of things! There was no rhyme or reason to the clutter, and Monkey’s stuff was EVERYWHERE.

Instead of tidying up my whole room to take photos, I would just move the mess out of the frame. Every picture I shared was the exact vibe I wanted my room to embody. The problem was, the only piece of my room that looked that way was the part being photographed. Everything else was chaotic. True story.
What Dany helped me do during this phase of my home refresh was envisioning what it would look like to have my whole room be clutter-free and airy — just like my vibe on IG. From there, we started editing because the heart of the issue was really that I had too much stuff. You can read more about my decluttering journey and learning to only keep my high-vibe essentials here!
In many ways, I didn’t have the right infrastructure in my room for the things I decided to keep, but Dany encouraged me to start learning how to live within the parameters that I currently had. Eventually, I upgraded to this large dresser from Restoration Hardware, which was the right size for my stuff, and turned into a focal point that guided several design decisions.
Space-Refresh Tip #1:
Identify what you want your spaces to feel like and believe that it is possible to bring that feeling into your entire home.
Baby Step #2: Embrace the Evolution of Your Space
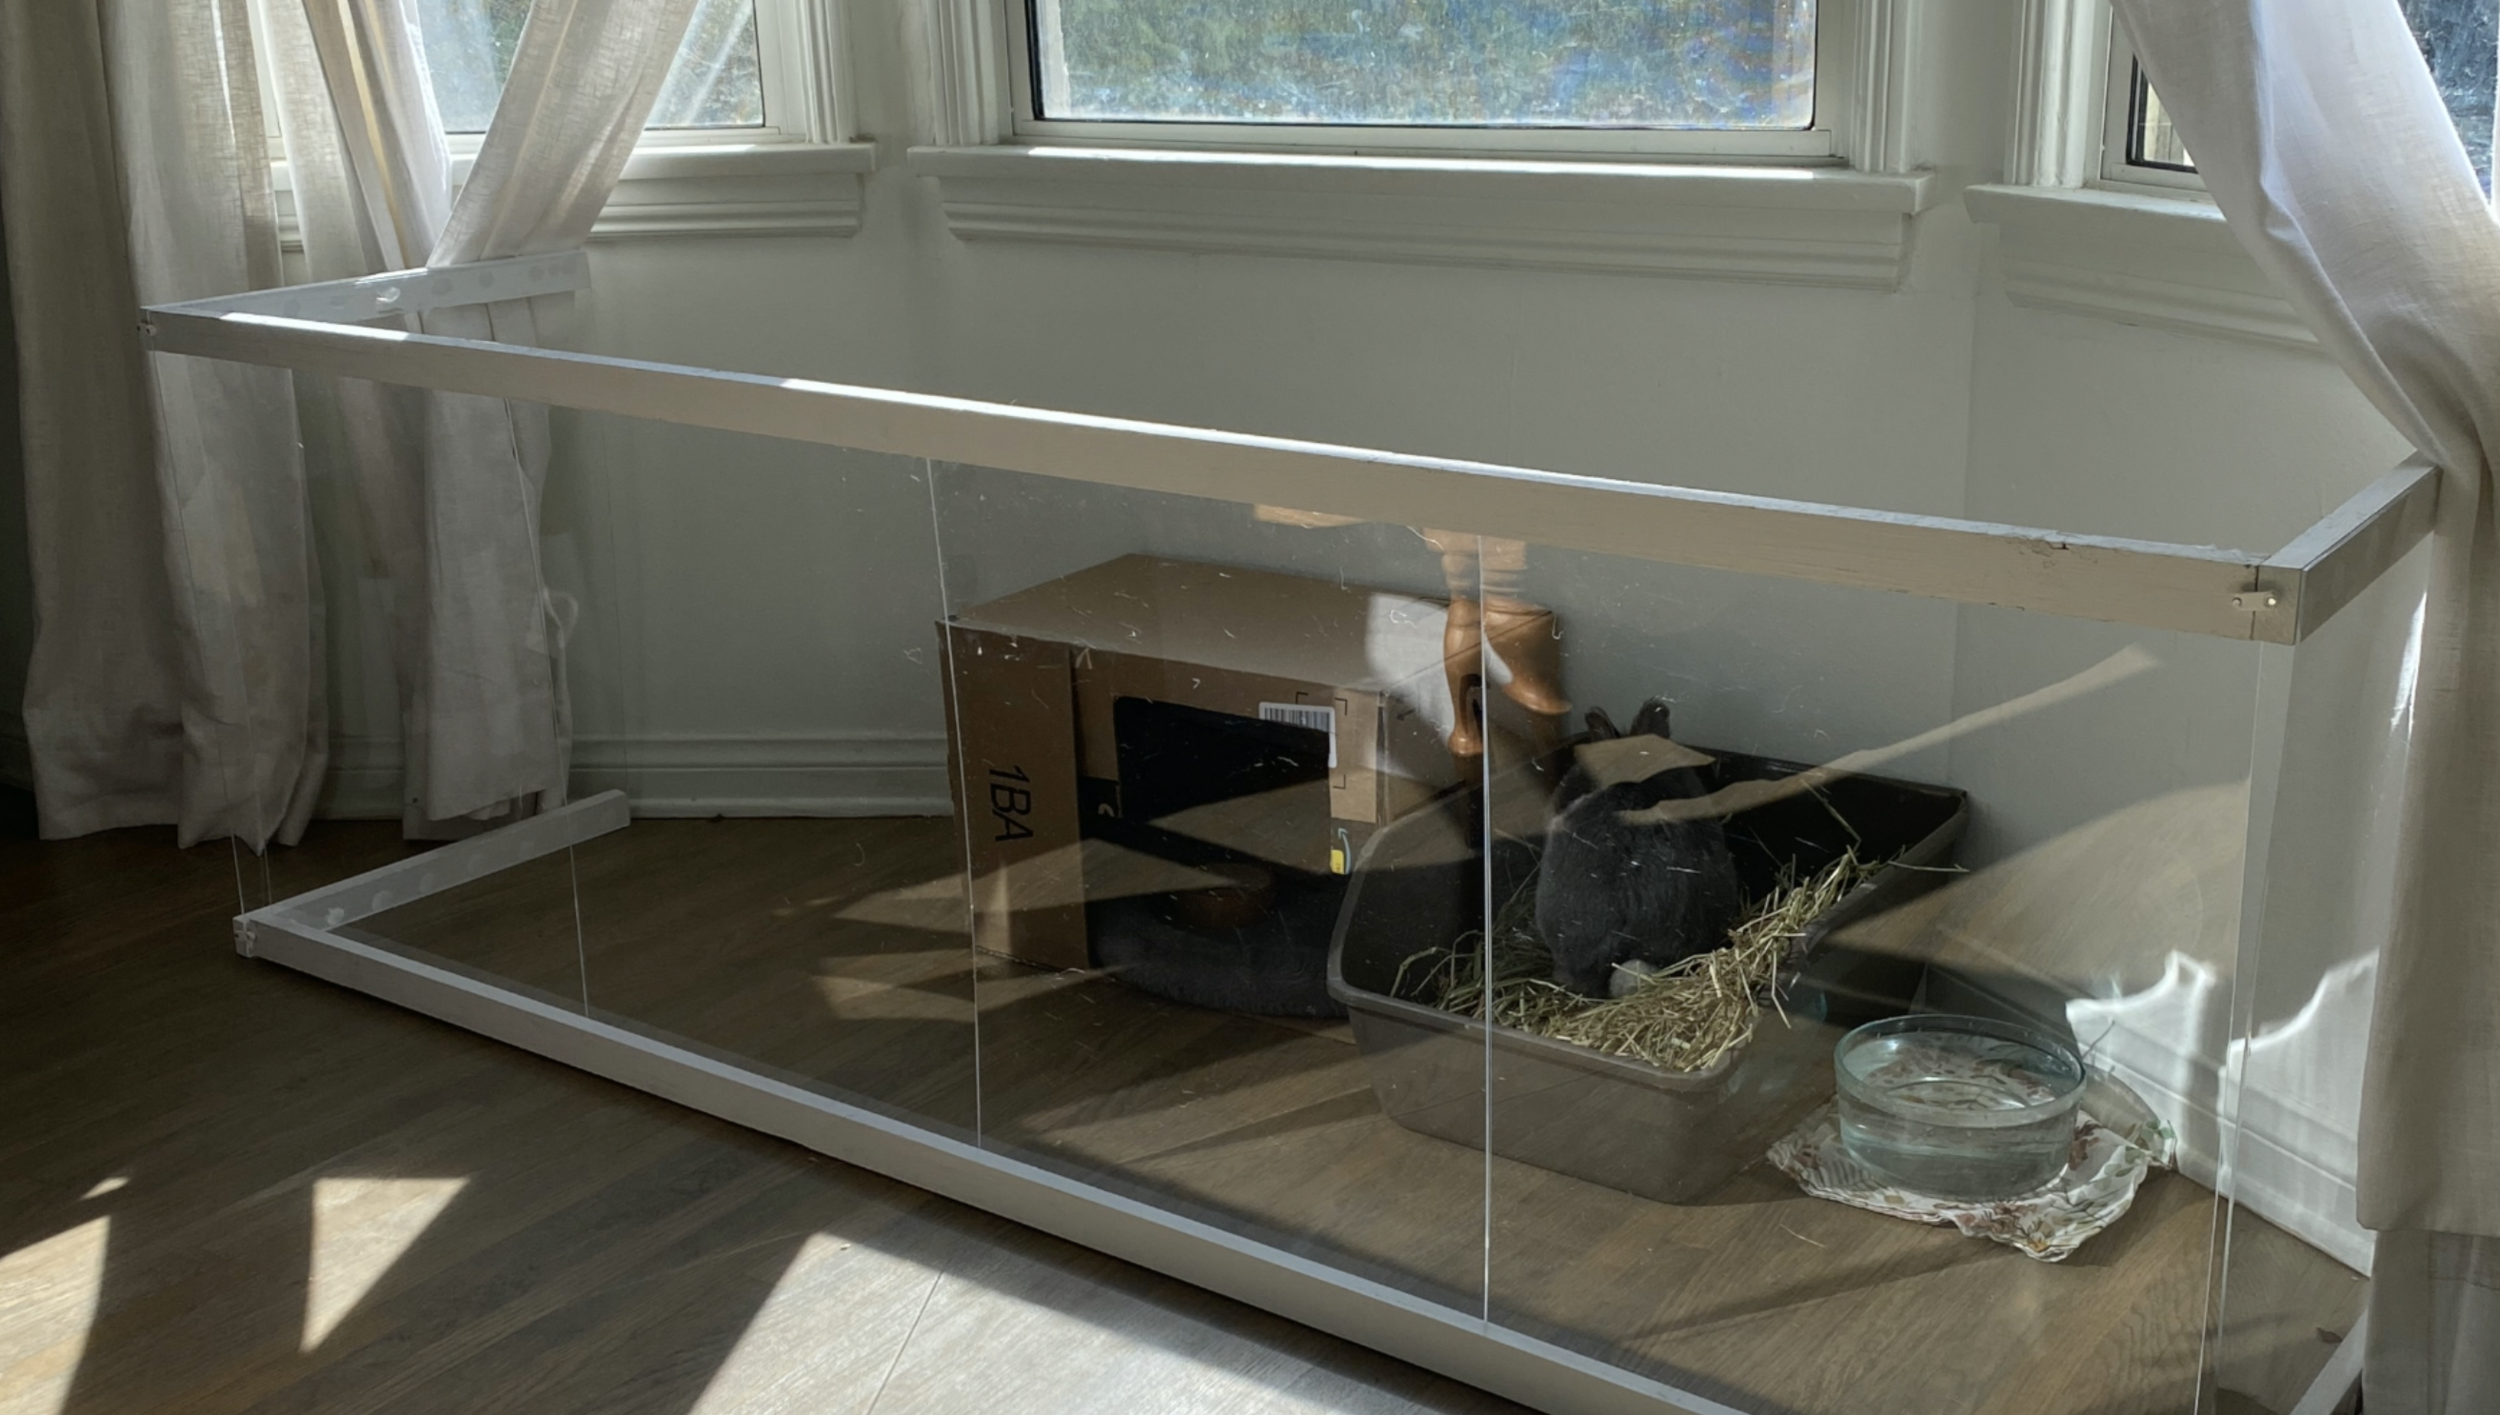
Like I said above, Monkey had been living in my room since we move in. Actually, he lived everywhere — I gave him free rein of the house. I didn’t have a designated, enclosed are for him, and his poop pellets and hay were all over my floor. One of the first things Dany suggested that we do was create a nice enclosure for Monkey.
That was way hard for me to wrap my mind around because at first I was like, “Do we really have to close in Monkey?” But we came up with an easy way to make a beautiful enclosure for him. Nate and I used pinewood and plexiglass to create a beautiful and minimalist-style structure that would give Monkey as much space as possible. Then we put it against the window where it was out of the main walk-way.
After I got comfortable with the new set up, Dany came over again and asked what I thought about moving Monkey to the office. She had recently seen me editing videos with Monkey inside my shirt, and it occurred to her that I spend more time with Monkey in my office than I do in my room. So, having Monkey in my office actually made more sense!!
This time, moving Monkey was a no brainer. But it took baby steps and me to realize that the best place for Monkey was in my office. Dany called these baby-steps to design your dream space “evolutions”:
“[Moving Monkey to the office was] like the evolution of all of it. We don't have all the answers in the beginning. But as the journey unfolds, things come together.” - Dany
After we settled Monkey in the office, we knew it was time to take my bedroom vibes to the next level. NOW I COULD GET A RUG!! (That he won’t chew through)
Space-Refresh Tip #2:
Embrace the evolution of your space and keep asking yourself, “Where would ______ make the most sense?”
Baby Step #3: Customize
This bedroom refresh is the first time I’ve had a headboard since I moved in. For real! Until now, I’ve been making do with a broken platform as a bed frame and rescuing my pillows from behind it every morning. It worked, but it just never looked finished. There was a plant in the corner that made Dany feel claustrophobic. And a random lamp on a stool for a make-shift bedside table. Like I said, it “worked,” but it didn’t look finished!
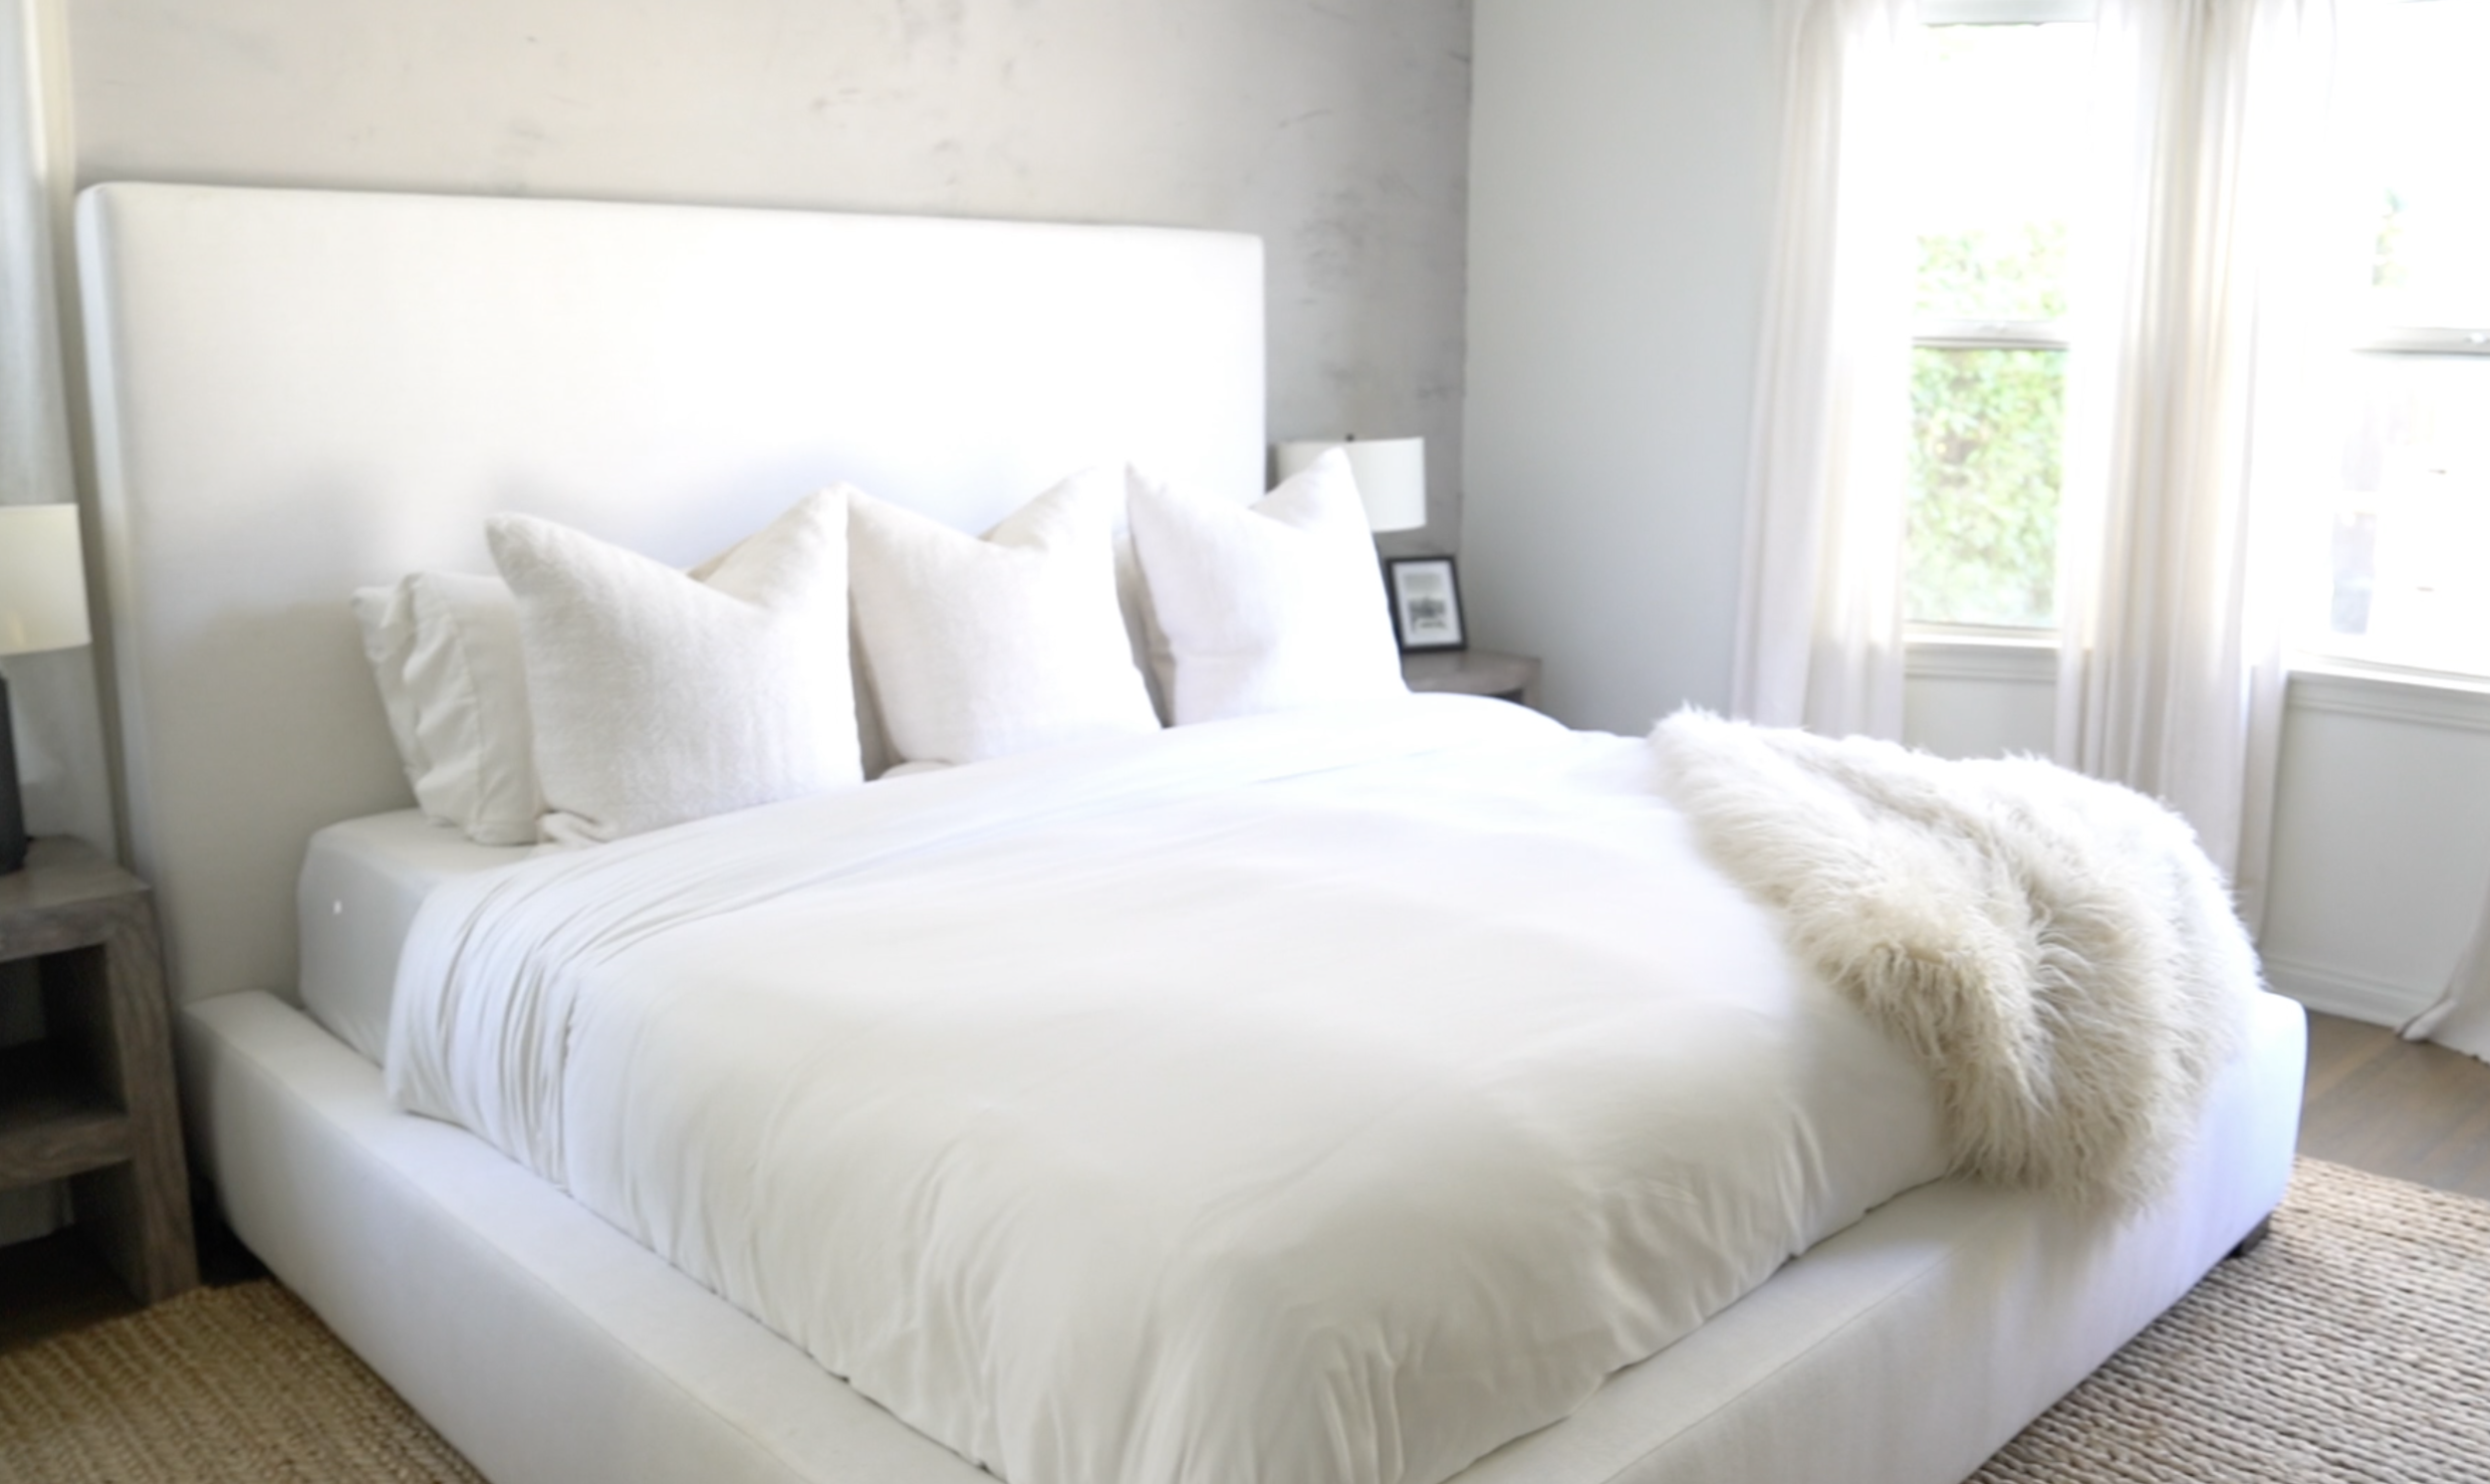
Obviously, the first order of business was to get me a proper bed frame and headboard. So, I reached out to Jamie Chan (323-252-5116), the guy who does custom furniture for me, asked him to copy the Restoration Hardware bed I really liked and do a few custom tweaks. RH has crazy ridiculous lead times and they wouldn’t ship out till months later so this was the next best option - plus a hair cheaper.
It was like night and day when we added that bed frame to my room. The tall five-inch deep headboard makes such a statement — just what I was hoping for. This same five-inch width goes all the way around my bed, too. While I wanted the bed to make a statement, I also wanted it to be super simple to make every day. So we opted for three large pillows from Pottery Barn.

They're just linen blend, woven and textured, but they’re literally one of my favorite parts of the room! They add a lot of depth to the bed and give the room an overall finished look. If you struggle to make your bed in the morning but want your space to feel put-together, I highly recommend this option!
For bedside tables, I had Jamie custom build them, too, and match their exterior to the large dresser I talked about earlier in this post. Instead of adding drawers, we added shelves to help me stay tidy and organized (I tend to just shove a bunch of things into drawers and jam it closed so the mess disappears). Turns out, the shelf really contributes to the clean and open look that I crave in my living spaces!
The final piece was deciding on these simple lamps from Restoration Hardware. I paired them with these lampshades. Confession: I tend to be one of those people who puts things in her cart and agonizes over them for daaaaays, especially when I’m not sure they will add enough to the room to justify their price. In this case, they were worth every penny and perfectly balanced my bedroom giving it the finished and elevated vibe that I had hoped for.
Oh, we also hung curtains over the windows! Fun fact: There are still pieces of scotch tape around my windows because I didn’t have curtains for the longest time. Instead, I would literally hang pillowcases with scotch tape lololol. Look how far we've come!
Space-Refresh Tip #3:
Don’t settle. If you have to make-do until you can save enough money to get the things you want, do that. But when it’s time to redo your room, save up for the things that speak to you and will last a lifetime!
Baby Step #4: Don’t Settle
I absolutely love my bathroom. It’s super unique with fun colors, a beautiful marble sink, and a stunning raised tub on marble pedestals. The only problem is, the sink has no drawers. So there’s nowhere for me to put all the things I need for getting ready each morning — not to mention all my facial products and makeup. So the first thing Dany wanted me to do was to get a vanity with drawers.
That was so hard for me because, like I said, I really wanted to keep the integrity of everything the previous owners had done to it. I couldn’t wrap my mind around how we could add drawers to my bathroom without taking away from its uniqueness. All that changed when my custom furniture builder, Jamie, was like, “I can totally build custom drawers to fit under that sink.”
Immediately, I said, “Okay, there's no way that I'm not doing that!” Let me tell you — those drawers have been an absolute game-changer. They are so functional. And, instead of taking away from the bathroom's integrity, they add to it, giving it more of that elegant hotel-like vibe!
Space-Refresh Tip #4:
Think outside of the box. If there’s something you really want and it doesn’t exist, consider how you could create it yourself or hire someone else to make it.

Baby Step #5: Add Finishing Touches in Threes
Now, for the fun touches! My dresser is quite a focal point, especially situated beneath my stunning mirror, so we decided to keep the decor on top super simple. On one end, we have two tall pillar candles with a shorter Diptyque candle and some of my favorite gold jewelry. On the other end, we have a stack of stunning art and architectural books with a faux choral piece on top and a beautiful Diptyque bottle to its left.

We also changed out the main lights in my room. Instead of Dracula scones that came with the original house, I styled my large floor length mirror with these sleek sconces from Restoration Hardware on both sides. At my closet entrance, we placed this elegant but understated hamper from CB2 for easy access and flow. This is an important piece bc it’s something that is out- it should all match the vibe!
I organized creams and knick-knacks in these glass canisters from CB2 and added this stacking glass set for mouthwash in my bathroom. The clear-glass look felt perfect for my bathroom because it provides functionality but lets the original integrity of the space shine. You can also catch a glimpse of this unique seagrass basket in my bathroom that gives me somewhere to toss my towels other than on my floor!
Space-Refresh Tip #5:
Keep finishing touches in threes. Dany says that odd numbers look better together than evens.
Why Giving Your Space a Refresh with Baby Steps Is Worth It!!!
I’m so grateful for Dany’s patience and guidance as I gave my bedroom and bathroom a refresh! With her help, I not only created my dream space, but I also learned that baby steps are sometimes the best way to get where you want to go. They leave room for you to reimagine things and let the process unfold in beautiful ways. Dany also said that taking things slow gives you time to understand what you really want for your space:
“Remember that this was a process. Remi used to keep pillow cases as curtains. When she moved in, she spent a lot of money just purchasing the house. She couldn't do all of the finishing at once. So if you're in [a similar] position, remember that it is a journey, and it does take time. And as you sink into your space, what you want for the space will change.” - Dany
It’s okay to take baby steps. It’s okay to put off refreshing your home until you’ve saved more money. It’s okay to refresh your house one room at a time. And just in case you think I have everything finished, you should know that I have to take cold showers lol. Getting hot water again requires knocking down a wall and retiling my beautiful bathroom, and you already know how I feel about disrupting its tile, so it’s a cold shower or hot bath for me. One day I’ll fix it…
That's a wrap for today! Thank you so much for reading! I hope you got some super fun ideas for making your bedroom the space of your dreams. If you did, take a screenshot of this and share it on social media. Tag me on Instagram @rrayyme, and tell me which tip was your favorite. Don’t forget to check out the vlog for this post so that you can see all the updates in real-life and subscribe to my channel for more lifestyle and beauty tips!
